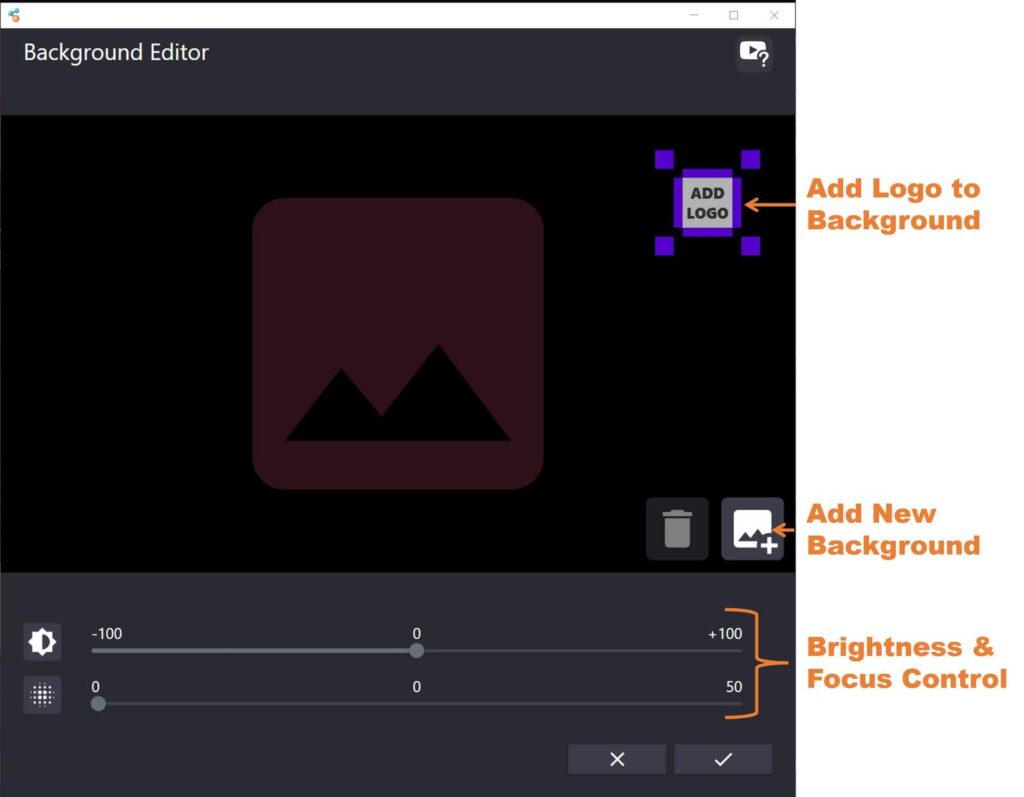
Reactiv STAGE allows you to customize the background image of the presentation workspace. You can add an image, and even a logo to really create a personal presentation experience.
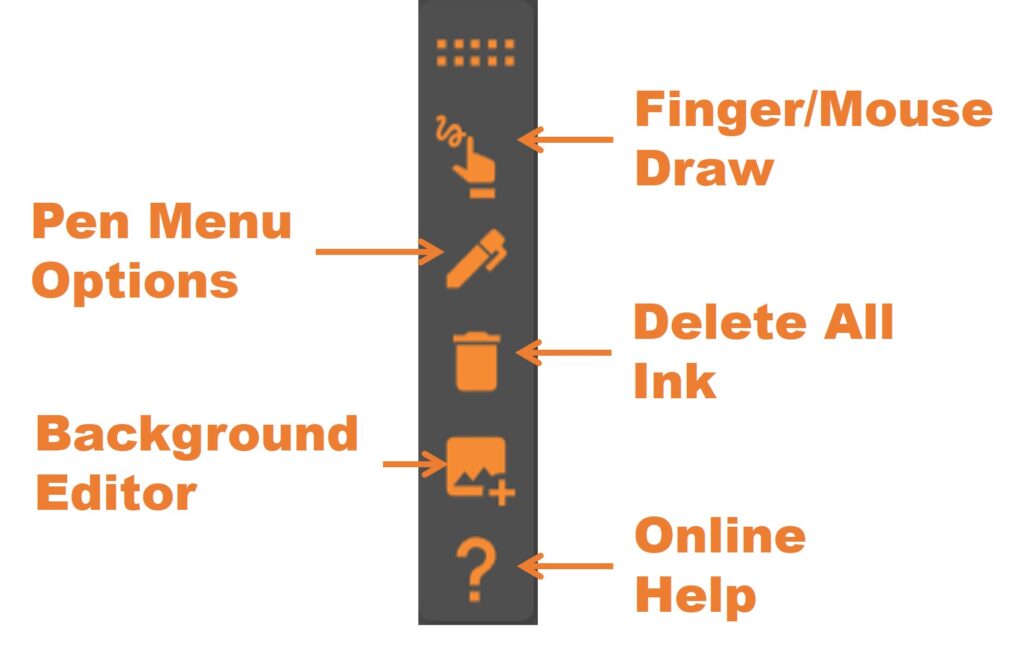
To invoke the background toolbar, just click or tap anywhere on the background.
Finger/Mouse Draw (CTRL / SHIFT) – When this button is toggled, your mouse (or finger on a touchscreen) becomes a pen to write. Conversely, holding down CTRL will immediately switch your mouse to a pen and SHIFT will make your mouse an eraser.
Pen Options Menu (ALT + 1/ALT + 2/ALT + 3) – This button allows you to switch between a pen/highlighter/laser pointer and also pick the colour, thickness and other parameters for the ink stroke.
Delete All Ink (CTRL + D) – Deletes all the ink in the document.
Background Editor – Invokes the background editor which allows you to select images for the background and the logo, and also allows you to adjust brightness and blur.
Online Help – This help page.
Reactiv SUITE offers an easy way to import any background and logo you want. Adjust the brightness, blur the image and combine your brand into the image as well! You don’t need to ask help from someone in marketing! 😉
Here are some PRO trips to follow:
- Try to avoid bright backgrounds that match your presentation or your image. You want the background to be muted and not distracting.
- If there is a lot of imagery on the background, try to blur it so it doesn’t attract too much attention.
- Try and add your customer’s logo to the background! These personal touches will be noticed and they will pay more attention.
You can easily adjust the brightness and focus of the image to get the right balance.